How to Run a Scan
In this simple tutorial example, we perform a basic scan on the samples directory distributed
by default with Scancode.
Warning
This tutorial is for Linux based systems presently. Additional Help for Windows/MacOS will be added.
Setting up a Virtual Environment
Scancode Toolkit 3.1.1 and Workbench 3.1.0 is not compatible with python 3.x so we will create a
virtual environment using the Virtualenv
tool with a python 2.7 interpreter.
The following commands set up and activate the Virtual Environment venv-scan3.1.1:
virtualenv -p /usr/bin/python2.7 venv-scan3.1.1
source venv-scan3.1.1/bin/activate
Setting up Scancode Toolkit
Get the Scancode Toolkit Version 3.1.1 tarball or .zip archive from the Toolkit GitHub Release Page under assets options. Download and extract the Archive from command line:
For .zip archive:
unzip scancode-toolkit-3.1.1.zip
For .tar.bz2 archive:
tar -xvf scancode-toolkit-3.1.1.tar.bz2
Or Right Click and select “Extract Here”.
Check whether the Prerequisites are installed. Open a terminal in the extracted directory and run:
./scancode --help
This will configure ScanCode and display the command line Help text.
Looking into Files
As mentioned previously, we are going to perform the scan on the samples directory distributed
by default with Scancode Toolkit. Here’s the directory structure and respective files:
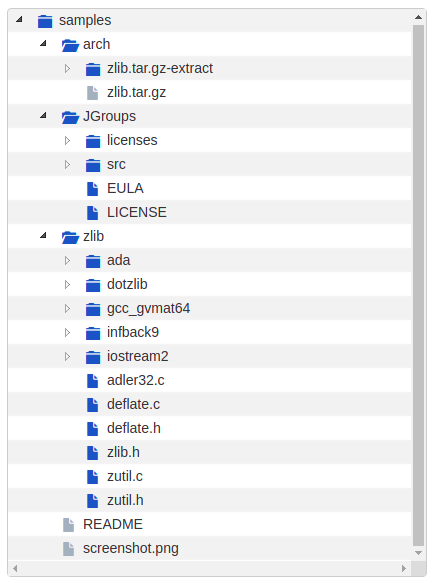
We notice here that the sample files contain a package zlib.tar.gz. So we have to extract the
archive before running the scan, to also scan the files inside this package.
Performing Extraction
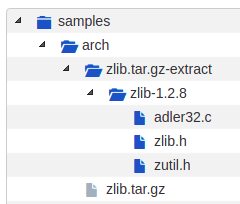
To extract the packages inside samples directory:
./extractcode samples
This extracts the zlib.tar.gz package:
Note
--shallow option can be used to recursively extract packages.
Deciding Scan Options
These are some common scan options you should consider using before you start the actual scan, according to your requirements.
The Basic Scan options, i.e.
-c,-l,-p,-e,-u, and-iare to be decided, according to your requirements. If you do not need one specific type of information (say, licenses), consider removing it, because the more things you scan for, longer it will take for the scan to complete.
Note
You have to select these options explicitly, as they are not default anymore from
versions 3.x, unlike earlier versions having -clp as default.
--license-score INTEGERis to be set if license matching accuracy is desired (Default is 0, and increasing this means a more accurate match). Also, using--license-textincludes the matched text to the result.-n INTEGERoption can be used to speed up the scan using multiple parallel processes.--timeout FLOAToption can be used to skip a file taking a lot of time to scan.--ignore <pattern>can be used to skip certain group of files.<OUTPUT FORMAT OPTION(s)>is also a very important decision when you want to use the output for specific tasks/have requirements. Here we are usingjsonas ScanCode Workbench importsjsonfiles only.
For the complete list of options, refer All Available Options.
Running The Scan
Now, run the scan with the options decided:
./scancode -clpeui -n 2 --ignore "*.java" --json-pp sample.json samples
A Progress report is shown:
Setup plugins...
Collect file inventory...
Scan files for: info, licenses, copyrights, packages, emails, urls with 2 process(es)...
[####################] 29
Scanning done.
Summary:        info, licenses, copyrights, packages, emails, urls with 2 process(es)
Errors count:   0
Scan Speed:     1.09 files/sec. 40.67 KB/sec.
Initial counts: 49 resource(s): 36 file(s) and 13 directorie(s)
Final counts:   42 resource(s): 29 file(s) and 13 directorie(s) for 1.06 MB
Timings:
  scan_start: 2019-09-24T203514.573671
  scan_end:   2019-09-24T203545.649805
  setup_scan:licenses: 4.30s
  setup: 4.30s
  scan: 26.62s
  total: 31.14s
Removing temporary files...done.